FrontPage 2002 Tutorials - Part II: I've Done My Homework. Can I Publish Now?
by Tina Clarke
(some tutorials cover FrontPage 2000 as well)
So, you've read Part I of this article and you've reserved your domain name, built and prepared your site and are now ready to get your content up on a server. Depending on your personal choices when you selected a web host you will now want to publish your website to a server with FrontPage Server Extensions or FTP for the first time.
Publishing To a Web Server (HTTP) Log onto the Internet. Open your web within FrontPage and make sure all pages are closed. Click on the navigation view and then go to Tools | Recalculate Hyperlinks - as outlined under 'Making a checklist' in Part I
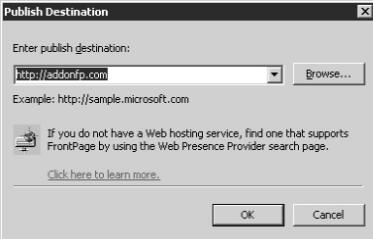
GoTo File | Publish Web. In the 'Publish Destination' dialog box that pops up insert the location of the web server you wish to publish to (e.g. http://accessfp.net/) and press OK.
click to view
A dialog box may appear asking if you want to create a web at that location, press OK to enable this to happen.
Next the 'Enter Network Password' dialog box will pop up. Type in the user name and password that were given to you by your host in the welcome emails. To save you re-entering these next time you publish, tick the box marked 'Save this password in your password list'. This makes sure only authorized users can access your web server.
NOTE: Always keep a hard copy in case your computer crashes.
FrontPage will think about it for a while and after your user name and password have been verified by the web server the 'Publish web' dialog box will appear and fill up in the left pane with the site you're publishing FROM and in the right pane the server or drive you're publishing TO.
NOTE: If your 'Publish Web' dialog box does not look like the one below you might have your 'Show/Hide' button selected in 'Hide' mode. Just click the 'Show' button on the bottom right if so.
click to view
NOTE: Next time you publish the website the location will already be filled in for you. FrontPage will compare the remote files (the one's on the web server you're publishing TO) with the ones you are publishing FROM and will then transfer only files that have changed since the last time you published.
Before you press that Publish button click the Options button on the lower left hand side. Click the Publish Tab and, since this is the first time you have published, make sure the 'All pages, overwriting all pages already on destination' radio button is selected.
NOTE: Next time you publish make sure the 'Changed pages only' radio button is selected, though it should be. Thereafter you can ignore this feature, unless you need to change the status.
In the same 'Publish' Tab under 'Changes' the 'Determine changes by comparing source and destination webs' radio button is selected by default, or you can change this to the 'Use source file timestamps to determine changes since publish'. This means FrontPage will look at the local publish logs and publish any updated pages since the last publish date.
NOTE: Be aware that if your sharing uploading with anyone else it can cause problems as the most recent files might not be the correct files. It is best to use the default option.
You can choose to 'log changes during publish', which I think is a good idea. Sometimes you need to check if files have been published or deleted.
There is an option to tick the box marked 'Include subwebs', however, in my experience, it is always best to publish subwebs by themselves. Merely open up the subweb in FrontPage and, when asked for the path, instead of using, for example http://accessfp.net/, insert http://www.accessfp.net/msbulletinarchives/, where /msbulletinarchives/ is the name of the subweb. (example. www.yoursite.com/yoursubweb)
When you have completed your Option selections press OK.
NOW you can press that publish button.
The 'Publish Web' dialog box will disappear and a box comes up that shows the progress as your files are uploading. The time this takes depends on the size of the web you're uploading and the speed of your connection.
Once your transfer is complete, FrontPage give you two choices of:
Click here to view your published site
Click here to view your publish log fileClicking either will open up your web browser to display the site or the log. You can then press 'Done'.-- Make sure you do this before logging off from the internet.
NOTES:
1. FrontPage 2002 now allows you to continue editing pages while it is publishing.
2. If you cancel publishing in the middle of the operation, files that have already been published remain on the destination Web server.Managing Your Publishing Process
Selective Publishing
All files are, by default, marked for publishing, this is a setting that can be changed in the 'Publish Web' dialog box however. For instance, you might have a page that is not quite ready, so if you right click on a page and choose page properties then click the 'Workgroup' tab and tick the box marked 'Exclude this file when publishing the rest of the web' then press OK, that file won't be published.
There are a number of ways to do this. For instance, you can select files at the point of publishing or through the folders view en masse. Go to File | Publish Web |. When the 'Publish Web' dialog box comes up, in the left hand pane either select a row of files by holding down the Shift key on the keyboard and clicking on the first file to be selected and then the last and the ones in-between will be selected, then right click and choose 'Don't Publish'. They will then be marked with a bright red circle with a white cross in it. Or you can select individual files in the column by holding down the Ctrl key on the keyboard and selecting them with the left mouse button, and the, again, right click and choose 'Don't Publish'. If you want to select the files through the 'Folders View, the same method applies.
NOTE: If you want to change the publishing status, just right click on a file and choose 'Publish selected Files'.
After you publish your first web site, if you have a guest book or discussion web and then later update your web site and publish all your files, your guestbook and discussion web content will be replaced with a blank page. Include pages with hit counters will also be over written, so it's important you choose to publish only those files that have changed. FrontPage compares the files in the working web site on your hard drive to the published files on the web server of the host and if FrontPage detects a newer version of a file on your hard drive, the file will be published to the Web Server (unless you specify otherwise). If you need to publish all pages again you should open the website live and keep a copy of the content files for the guestbook and discussion web.
Publishing Single or Selected files
If you just want to publish one file or a few selected files, go to the Folders List or Folders View. Select the files you want to publish by holding down the Shift key on the keyboard and clicking on the first file to be selected and then the last and the ones in-between will be selected, then right click and choose 'Publish selected files'. Or, you can select individual files in the column by holding down the Ctrl key on the keyboard and selecting them with the left mouse button. The 'Publish Destination' dialog box will appear. Make sure the location is correct. If not, type it in or browse to it and press OK. A dialog box will appear called 'Confirm copy' and proceed to publish the files you have selected. Using this method, however, the 'Done' dialog box will not appear.
This can be a problematic method however and should be used sparingly. Errors may occur and FrontPage might be prevented in transferring all files so it's best to publish the entire web every now and again if you use this method so FrontPage can make sure everything is up-to-date.
Publishing to an FTP Server
This is basically the same method however you publish to a ftp location instead of a http. e.g., ftp.thedomain.com. The host will give you the details you need, similar to the http publish details outlined in Part !. You will be prompted for a user name and password, if this is the first time you have published to this destination and FrontPage will warn you that a web does not exist and ask if you wish to create one. Click OK.
You can also use a third party publishing application such as WS FTP PRO or WS FTP Lite or Cute FTP
Publishing To a Location on Your Hard Drive
Again you use the same method but your destination is your hard drive. If you're using disk based webs it will look something like this: C://my documents/my webs/nameofweb
TROUBLESHOOTING
1. HTML Filenames are case sensitive
I recommend you upload your files in lowercase only. If you have already made your web with uppercase file names Jimco has a FREE FrontPage addon at called Case Changer 1.5 FrontPage 2k0/02, that will change all uppercase file names back to lowercase for you. This is a life saver when working with Unix servers! They have another add-on called Space Replacer FrontPage 2k0/02, which replaces spaces in file and folder names with an underscore character. When you write your html files, be sure to refer to any image or other html files in lowercase also. Your HTML and actual filenames must match exactly, in order for your page to display correctly.
2. Member Names and Passwords are case sensitive so make sure to check whether or not your cap lock key is on.
Remember that your Member Name and Password are case sensitive and you must enter them exactly as shown on your Welcome email: e.g., if your member name is "joe", entering JOE will not work. This also applies to your password, and the names of any files you upload.
3. If, after you publish your web site, certain components don't work:
You may have published to a Web server that does not have the most recent version of the Microsoft FrontPage Server Extensions or SharePoint Team Services from Microsoft. Without the server extensions, certain features will not work, such as most form handlers, search forms, and hit counters. Check with your Internet service provider or web site administrator to find out if the Web server you are publishing to has the necessary server extensions.
4. If you want to publish a file that you originally set as Don't Publish.
On the File menu, click 'Publish Web'. Right-click the file, and click Properties on the pop dialog box. Click the Workgroup tab. Untick the check box that says 'Exclude this file when publishing the rest of the Web'.
5. If you re-publish a web site with a guestbook that has site visitors' input, and now the pages are blank:
Certain files should not be published again after you first publish your web site. If you have created and published a web site with a guestbook, and then later update your web site and publish all of your files, your guestbook will be replaced by a blank one, causing you to lose all of your information. Other examples include pages with a hit counter or discussion web sites.
6. If your SharePoint Team Services document library, interactive list, or survey is not published when you publish your web:
If your web site contains a SharePoint Team Services document library, interactive list, or survey, you must author your web site directly on a server that is running SharePoint Team Services from Microsoft.
7. If you can't publish your Web site based on SharePoint Team Services to another server.
Because a Web site based on SharePoint Team Services from Microsoft contains certain components that only work on the server on which they were authored, you can't publish it elsewhere.
Happy publishing!
First Published in ABC ~ All 'Bout Computers
Volume 24, May 2003