
FrontPage 2002 Tutorials - Tasks view - Task management system. Working with Tasks & Mark a task as completed
by Tina Clarke
(some tutorials cover FrontPage 2000 as well)
When you are making a site you will have a list of ‘Things to do’ or, in other words, ‘Tasks to complete’. FrontPage kindly helps you do that with a task management system called Task View, which helps you organise the work involved for developing and maintaining your website. A good way to structure Tasks is to assign them to individual web pages contained within a web. You can then monitor the tasks in your web site. Tasks view displays all the tasks in your web site in a column format and provides current information about each task under the following column headings:
- Status — Completed or in progress.
- Task — The task name.
- Assigned to — User name or workgroup.
- Priority — High, medium, or low.
- Associated with — The name of the file the task is associated with, if any.
- Modified date — The last time the file was modified.
- Description — A description of the work that needs to be done, or any other information you feel is necessary.
You can sort tasks by any column heading shown in Tasks view.
Working with Tasks
Create New Tasks
Click the ‘Task’ icon on the ‘Views Bar’
![]()
Right click an empty space in the ‘Task View’ Pane, and a box will pop up listing
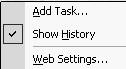
Add Task
Show History
Web Settings
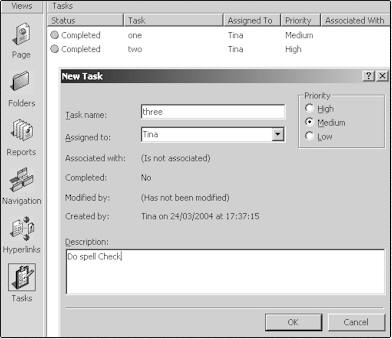
Click ‘Add Task’ and a dialog box called ‘New Task’ will appear.
 click to view
NOTE: You can also bring this box up by going to File | New | Task.
In the ‘Task Name’ box, enter the name of the task.
Specify the settings you want for this task:
* (See more on assigning below)
Tasks can help you track work that needs to be done in your web site. You can assign a task to a person or workgroup. Tasks can contain a description of the work to be done on the web site or on a specific file. For files, you associate that task with a file, and then assign it to yourself or a co-worker. Tasks can be associated with any file in your web site — a web page, a picture, a sound, another Microsoft Office document, and so on.
In the ‘Assigned to’ box, type or select the name of the person, workgroup, or other area you want to assign the task to.
In the ‘Description’ box, type a description of the task. You can use this field to describe the work that needs to be completed or the work that was done on the task.
NOTE: If a task has been marked as Completed, you can change the task's description but not its name.
You can prioritize a task after you've created it. In Tasks view, click the cell in the Priority column of the task you want to prioritize, click the cell again, and then click High, Medium, or Low. This will override any priority set when the task was created.
In the ‘Priority’ area, click a priority for the task, ‘Low’, ‘Medium’ or ‘High’.
NOTE: If a task has been marked as Completed, you can't change its priority.
If you don't prioritize a task, Microsoft FrontPage assigns the task a priority of Medium by default.
Click Ok, and the Task appears in the ‘Tasks View’.
Start working on a task
If the task is associated with a file, in ‘Tasks View’, right-click the task, and then click ‘Start Task’ on the shortcut menu: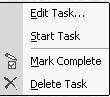
Edit Task
Start Task
Mark Complete
Delete Task
If the task is not associated with a file, in ‘Tasks View’, right-click the task, and then click ‘Edit Task’ on the shortcut menu.
NOTES:
When you start a task associated with a page, Microsoft FrontPage opens that page in ‘Page view’.
When you start a task associated with another type of file, FrontPage opens the file in its associated editor (Word for .doc files, Notepad for .txt files, and so on).
To configure editors, click Tools | Options and click the ‘Configure Editors’ tab’
When you have completed working on the task, go to File | Save on the menu bar.
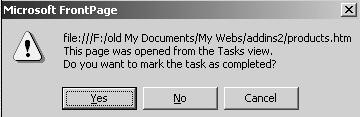
Since in this case you started a task associated with a web page, and this is the first time you have saved the page in ‘Page View’, FrontPage will ask if you want to mark the task as completed, Click ‘Yes’.
Mark a task as completed
Do one of the following:
In ‘Tasks View’, right-click the task you want to mark as completed, and then click ‘Mark as Completed’ on the shortcut menu.
If you started a task associated with a web page, the first time you save the page in ‘Page View’, FrontPage will ask if you want to mark the task as completed. Click ‘Yes’.
Click the Task View icon. The circle in front of the task should now be green if you clicked ‘Yes’.
NOTE: When the Show History command is not selected, FrontPage hides completed tasks. To show completed tasks, right-click on the background in Tasks view, and then click ‘Show History’ on the shortcut menu. If you open, close, and reopen FrontPage, and then click Task View, the completed tasks no longer appear, again clicking the ‘Show History’ command will show all completed tasks.
Assign a task
Do one of the following:
Assign a task when you create the task
On the File menu, go to ‘New’, and then click ‘Task’.
In the ‘Task name’ box, type the name of the task.
In the ‘Assigned to’ box, type or select the name of the person, workgroup, or other area you want to assign the task to.
NOTE: If you create a task in ‘Page view’ while editing a page, the task is automatically associated with that page file. The name of the file associated with the task, if any, is displayed in the ‘Associated with’ field in the ‘Assigned to’ report.
Assign a task after you've created the task
In Tasks view, click the cell in the ‘Assigned to’ column of the task you want to assign.
Click the cell again, and then type or select a name. This will override any assignment made when the task was created.
You can assign a file to a person or workgroup. For example, in a workgroup setting, a product manager assigns files to different workgroups. Individual workgroup managers then assign specific tasks for those files to individuals in their workgroup. Using ‘Workflow reports’ such as the ‘Assigned to’ and ‘Review status’ reports, the product manager can monitor the file's progress, and with ‘Tasks View’ the individual workgroup managers can monitor the progress of each task.
When you assign a file to a person or workgroup, you can add a Review status that explains the status of the work done on the file. For example, if a file requires a legal review, you could create a review status called "legal review," specify that status for the file, and then assign the file to the co-worker responsible for completing this task. After the file has been legally reviewed, the co-worker can then specify a status of "approved."
You can view the files in your web site by assignment by viewing the ‘Assigned to’ report. The ‘Assigned to’ report displays all the files in your web site in a column format and provides the following information about each file:
- File name — The name of the file.
- Title — The file title.
- Assigned To — User name or workgroup.
- Assigned Date — The date the file was assigned.
- Assigned By — Who the file was assigned by.
- Comments — Comments that describe the work that needs to be done, or any other information you feel is necessary.
- Type — Indicates the type of file; for example, .gif, .css, .htm.
- In Folder — The folder in the web site where the file is stored.
You can sort files by any column heading shown in the Assigned to report. You can also filter on the values displayed in any column in the report. To display the filtering choices for that column, click the column heading.
To find out more about the Workflow process see my article
Points of View – Reports, Part I
First Published in
ABC ~ All 'Bout Computers
Volume 35, May 2004